How to create an cross platform android app with Apache Cordova
Lets follow the documentation from apache cordova
npm install -g cordova
cordova create MyApp
cordova platform add browser
cordova platform add android
Now navigate to your project root folder
npm install npm-run-all -D
Edit your package.json as below
“scripts”: {
“test”: “echo \”Error: no test specified\” && exit 1″,
“watch”: “chokidar \”www/**/*\” -c \”cordova prepare browser\””,
“run”: “cordova run browser”,
“start”: “npm-run-all –parallel watch run”
},
Execute npm start so you can start coding as required.
Download Android Studio and update the environment variables. Download Gradle binary and unzip it.
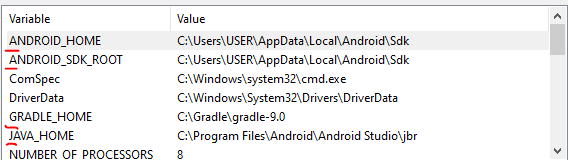
Update the path in Environment variables
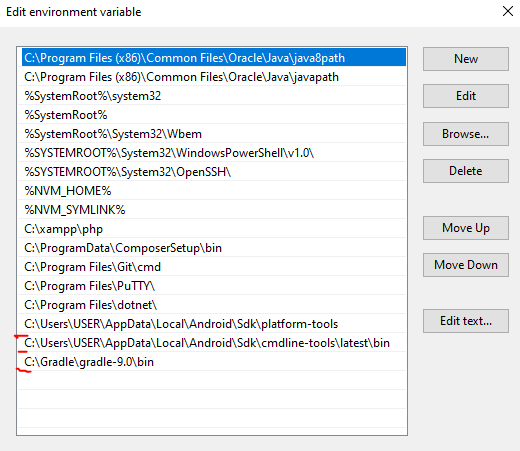
You should not get any error on below commands
gradle -v
adb –version
sdkmanager –list
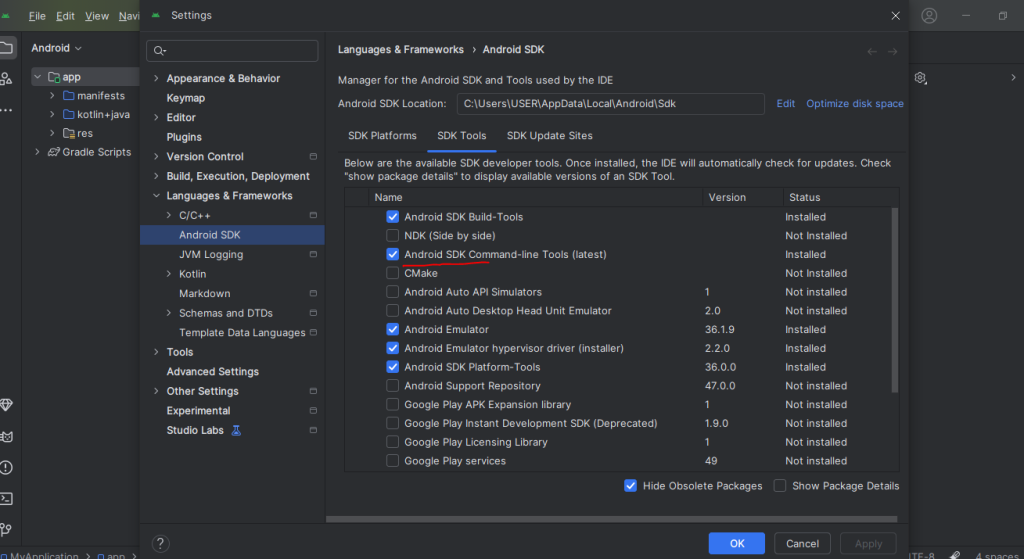
To install cmdline-tools
Goto Android Studio -> Tools -> SDK Manager and check and install the latest command line tool
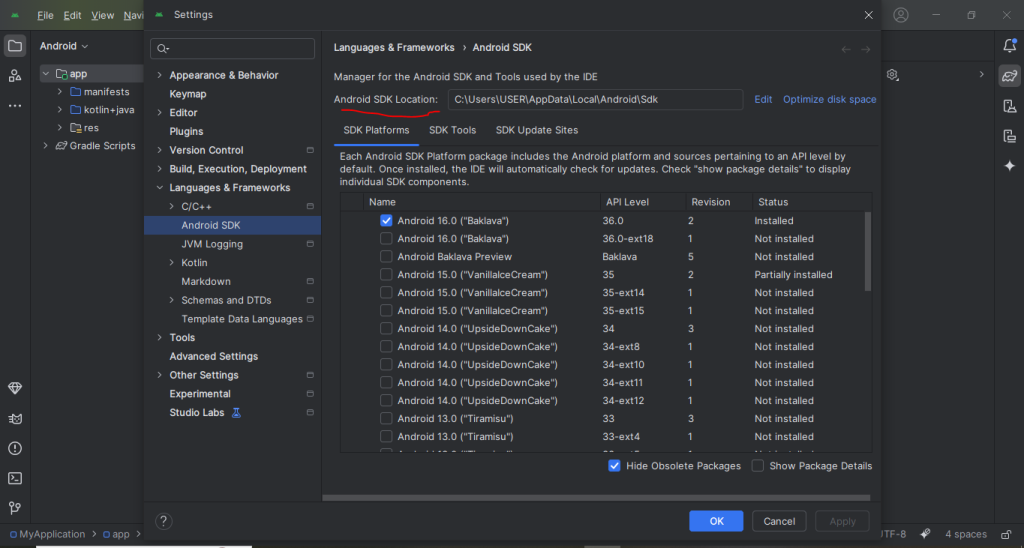
To know the android sdk location use Android Studio -> Settings -> Android SDK
Now run cordova build android you shall get the apk file
Enable Developer Mode on your phone:
- Go to:
Settings > About phone > Tap "Build number" 7 times - Then go to:
Settings > Developer options > Enable "USB debugging"
Connect your phone via USB
Open Command Prompt on your PC, navigate to your project directory:
cd platforms\android\app\build\outputs\apk\debug

Run the install command:

adb install app-debug.apk

Let’s customize your app’s name, icon, and that mysterious “watermark” icon (called the adaptive icon).
🎯 1. Change the App Name
The name “Hello Cordova” comes from your project’s default config.xml.
✅ Edit config.xml in the root of your project:
<name>Your App Name</name>
Example:
<name>Fart Madness</name>
Then rebuild your app:
cordova build android
🎨 2. Change the App Icon
Cordova uses a plugin called cordova-plugin-splashscreen and checks for icon definitions in config.xml.
✅ Step-by-step:
a) Create your icon:
- Best size: 512×512 PNG
- Save it as:
res/icon.png
b) Install icon plugin (if not already):
cordova plugin add cordova-plugin-splashscreen
c) Update config.xml with icon definitions:
<platform name="android">
    <icon src="res/icon.png" density="mdpi" />
    <icon src="res/icon.png" density="hdpi" />
    <icon src="res/icon.png" density="xhdpi" />
    <icon src="res/icon.png" density="xxhdpi" />
    <icon src="res/icon.png" density="xxxhdpi" />
</platform>
You can also use tools like cordova-res to auto-generate icons.
💧 3. What Is That “Watermark” Icon?
That semi-transparent or background-layer icon is the adaptive icon — used in newer versions of Android (8.0+).
It consists of:
- A foreground layer (your icon)
- A background layer (optional background shape)
✅ Fix it properly:
Create two icons:
icon-foreground.pngicon-background.png
Use a plugin like:
cordova plugin add cordova-plugin-adaptive-icon
Or manually replace icons under:
platforms/android/app/src/main/res/mipmap-anydpi-v26/
Files:
ic_launcher.xmlic_launcher_round.xml
You can generate adaptive icons using tools like:
👉 https://easyappicon.com/
✅ Summary:
| What | Where to Change |
|---|---|
| App Name | config.xml → <name>Your App Name</name> |
| App Icon | Add icons and define in config.xml or use cordova-res |
| Adaptive Icon | Replace foreground/background icons in res/ folder or use plugin |
Let me know if you want help generating adaptive icons from your current logo — I can create the XML or guide you through it.